

I found my 65 Riviera in the USA in 2011 and I mildly customised it to my own personal taste by changing the colour, debadging and trimming the seats in leather, away from the factory stitching and plush carpet. It did have Gran Sport running gear but the VIN did not match the engine number so someone had put the LX factory dual quad engine and BS transmission in it at some stage. If it had been a complete genuine GS it would have been silly to molest it.
In some ways I was relieved that it wasn’t a genuine GS because I had always wanted to put a modern engine in one of my Buicks (restomod) and the 65 is a perfect size car being a bit smaller than all the later generations. As it happened the engine eventually got very tired and gave me a few blow by and crank case pressure issues on a trip to Adelaide and back in late 2019 for the ROA Nationals.
On my return to Sydney I did a compression test which confirmed the engine needed some serious attention. Now I was faced with two choices. 1) rebuild the nailhead or 2) put in a modern fuel injected power plant.
I chose the latter and started looking for suitable engines that would be strong enough to push the Riv along at a respectable rate.
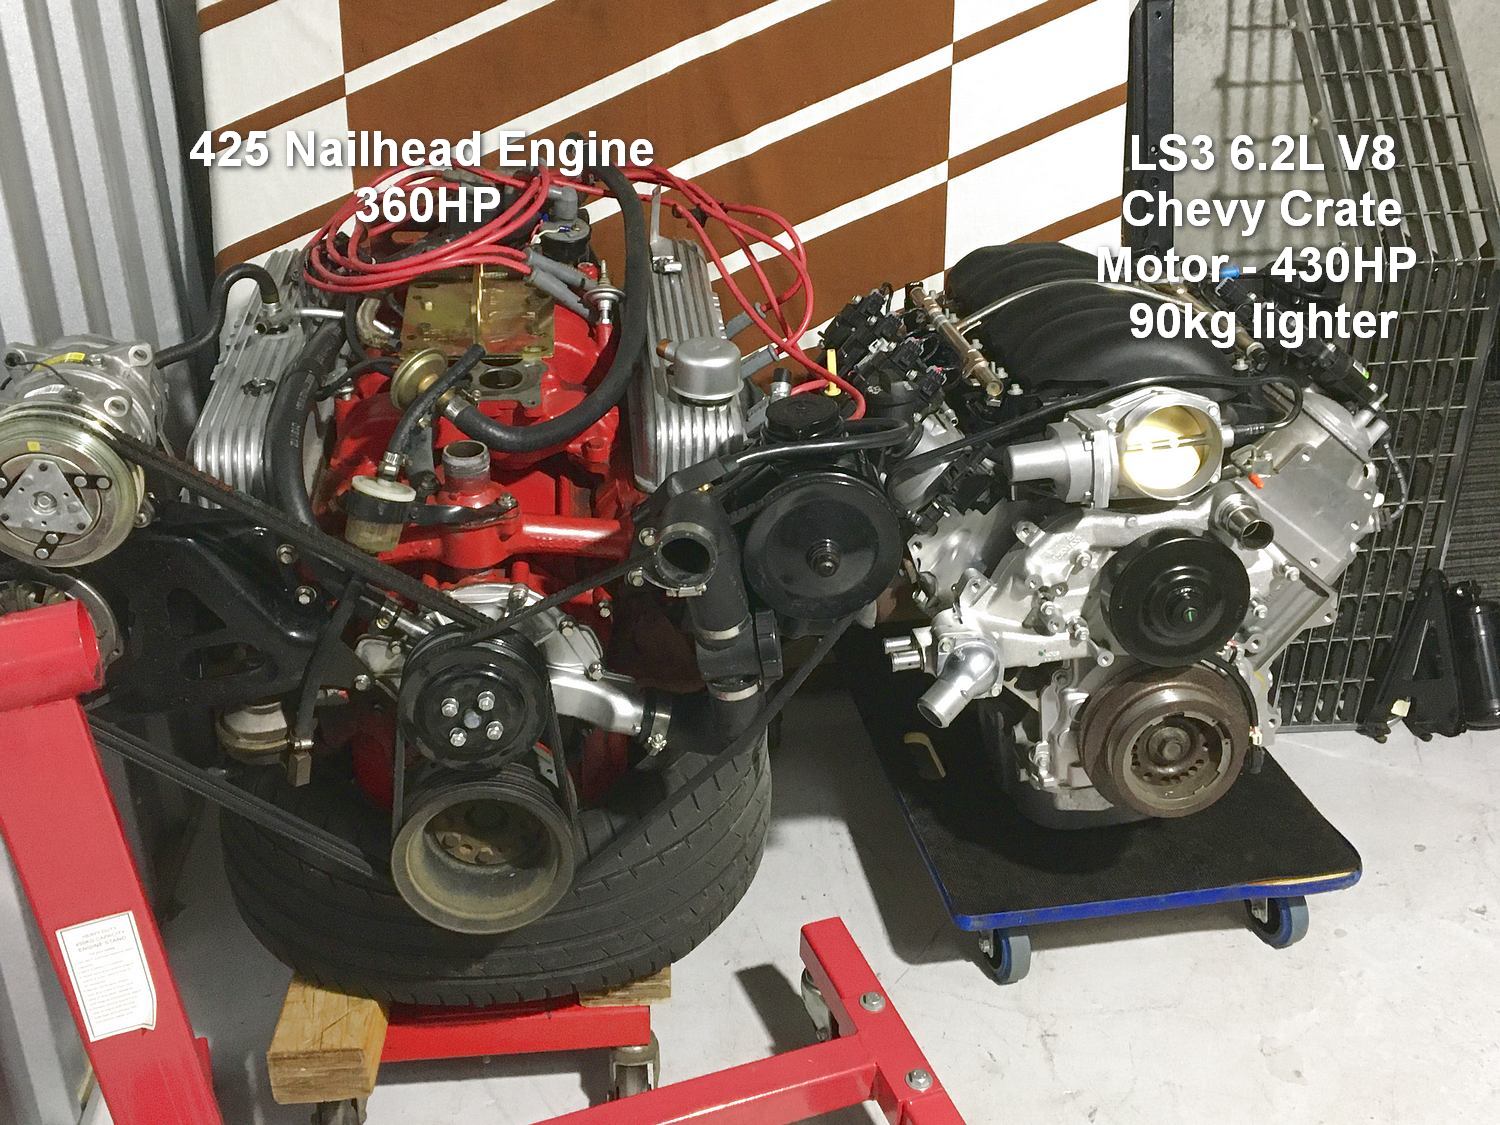
I decided the LS3 6.2L engine would be a great option with 430HP and 420ft lbs of torque and 90kg lighter. I looked at buying something out of a wrecked HSV or SS Holden but I thought you never know what you’re going to get so why not buy a brand new crate engine made by Chevrolet Performance. To keep it simple I decided to have a strong Chev Turbo 400 transmission built because they bolt straight on to the LS engines, don’t need a computer to run them and would fit the stock transmission tunnel. The LS engines are capable of making easy power by simply changing the cams or adding a super charger and the bottom end will take 800 HP easily without fear of breaking.
It didn’t take long to find one at the right price. Crate engines don’t include anything except the water pump so it is a bit more expensive than at first glance. You need a starter motor, alternator, PS pump, AC compressor and all the brackets. Then you need someone to make you a stand alone harness with a matching CPU and Fly By Wire Gas pedal. No problem, it’s only money!
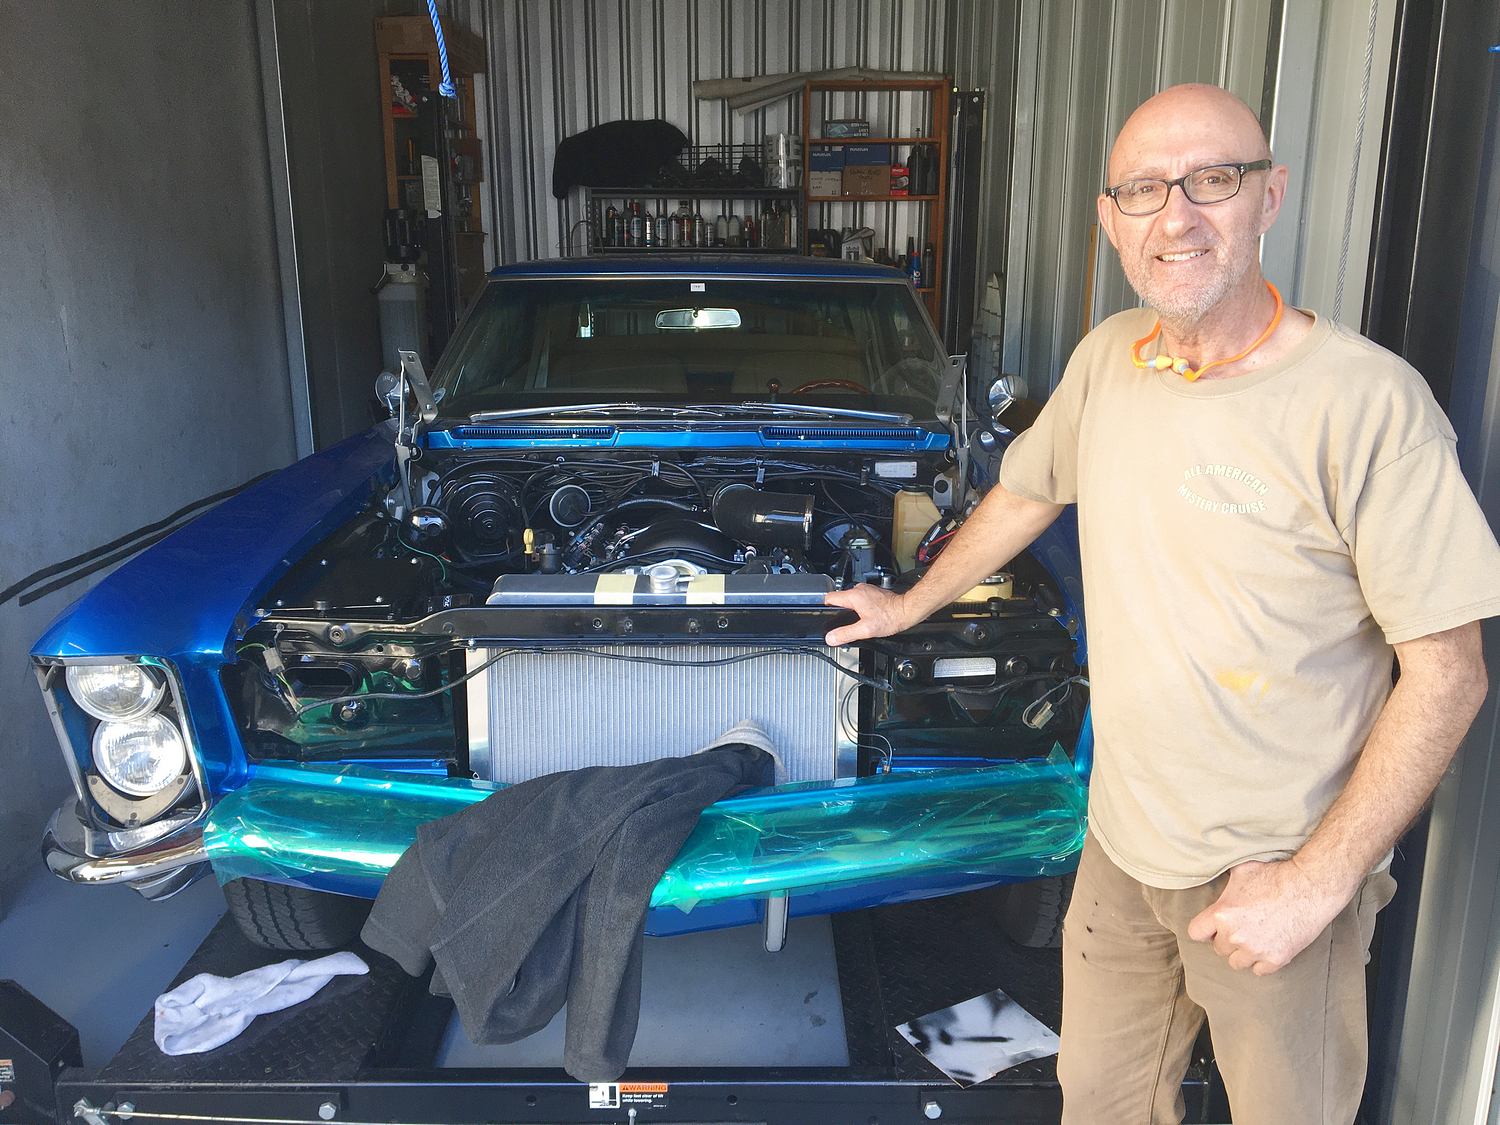
I started removing the old engine in mid February 2020 and then gutted the engine bay and did a deep clean of 55 years of accumulated grease and rubbish right back to the rear bumper, chassis was taken back to bare metal and repainted plus trans tunnel stripped and painted with body deadener.
These are some of the considerations and logical steps should you ever wish to take the plunge:
Step 1: The Engine Mounts
Amazingly, the angle of the old and new engines where the mounts bolt on was the same so I just had to make adaptor plates for the new mounts and I chose the type which just have one bolt through the middle for easy engine removal in the future. I was able to borrow a damaged LS block as a dummy to lift in and out numerous times with more ease than the complete engine.
The LS engine’s heads are flush with the rear of the block, unlike the nailhead where there’s quite an extension for the distributor so the engine needed to come forward enough to clear the firewall. Luckily, the chev TH400 bell housing is 35mm longer than the Buick one which meant the engine came forward enough to clear the firewall. Big bonus because I didn’t have to change anything rear of the transmission. Trans cross member, factory shifter linkages and tailshaft required no mods.
Step 2: The Engine Sump Pan
this was a different story. No one makes after market LS sump pans to suit any Buick Rivieras. This meant that the factory LS3 alloy sump had to be heavily modified to clear the cross member and drag link. I bought a spare sump just in case I stuffed up the first one but “measured numerous times and cut once” and didn’t need it. I wanted to maintain the factory oil filter and make up some of the oil volume that was lost by adding side riggers. Luckily once again that the original LS oil pickup was in the correct place and did not need relocating.
Step 3: The Fuel Delivery System
Choosing a pump: I preferred to have an in-tank pump because they are quiet and don’t overheat. I chose a readily available VE V8 Commodore Ute pump which was the correct depth to suit the shallow factory tank. I cut a hatch in the floor of the trunk for easy replacement when needed in future. The other advantage of this pump is that it runs an internal pressure regulator and return line. The sender unit is built in too but wouldn’t talk to the original gauge so I found a product called “Meter Match” by Tanks Inc which can be calibrated to suits anything. I was able to reuse the original steel fuel line from the tank up to the normal point just behind the front RH wheel and then ran 3/8″ aluminium tubing up and across the firewall to the LH side of the engine.
My engineer also advised that I had to run a Charcoal Canister which vents the tank fumes into the engine’s throttle body through a CPU controlled solenoid. I found that a Chrysler canister fitted neatly due to it’s rectangular shape. I used the old 1/4″ steel return line and plumbed the rest with a rubber line to the solenoid. Everyone’s happy.
Step 4: The Cooling System
I decided to have a new aluminium radiator custom-made exactly the same size as the old one but with the inlet and outlet on the correct sides to suit the LS. It also runs twin 12″ thermo fans which are controlled by the ECU to come on staggered at 97C and 99C. The same company also custom-made me a transmission cooler/AC condenser combo to fit in the same space as the factory condenser. I went to great pains to reinstate the the factory Cold Light and Hot Light with an extra bung in the top tank for the sender and I’m still running mechanical temp gauge with another sender in the top radiator hose. I also reinstated the factory oil pressure light and mechanical oil pressure gauge. The ALT light is now the Engine Warning light and should the CPU throw a code it flickers.
Step 5: The Exhaust System
Again, there is no after market exhaust manifolds for a full size Buick LS swap. The stock LS manifolds interfered with the steering box and so did the snugger Hooker headers I bought. I had to buy stainless steel extractors for a 67-69 Camaro LS Swap and have them modified to clear on both sides. To satisfy emissions regulations I had to fit catalytic converters and get a decibel reading below 90db at 75% of maximum rpm which was over 4,000rpm. Two extra mufflers got it down and the engineer certified the modifications.
Step 7: Front Springs Reset
Due to the engine being 90kg lighter than the nailhead I had to have the front springs reset 2″ lower to make it level again.
Summary
It was very satisfying to do the first start of the engine in mid June without a hitch. YouTube Video https://youtu.be/iHEpVb7S5ro
I thoroughly enjoyed this project during the Covid19 lockdown and learnt a lot about modern technology and terminology.
It’s not something to do if you want to save money because it’s cost a bit over double what an engine rebuild would have cost and that’s with me doing much of the work.
I’ve only done about 600 miles so far but must say the car goes very well and has plenty of power. I had it dynotuned which is recommended to unleash some of the power locked away by GM to pass US emissions. It achieved 363HP at the rear wheels and that’s a dead stock LS3.
I’m happy to answer any questions should I have missed anything or if anyone want more detail.
The Complete Slideshow: https://photos.app.goo.gl/W6stpbLhqfw1Aseb8
Tony Gentilcore
ROA 10107