
Possibly the only good thing about the latest lockdown is not working the same hours as usual, freeing up time for other things. Even though my occupation is deemed essential, I have been finishing work at 4pm, freeing up that late afternoon time before dinner.
I’d been meaning to replace the perished original driver’s side window channel seal on my ‘65 Riviera for some time, it’s poor condition creating too much wind noise at highway speed when all the windows are closed. I’ve had a new one and also a door seal waiting to be installed after ordering from US Buick parts supplier CARS some time ago.
Door skin removal
To remove and replace the channel seal many Riv owners, but not all Buick owners, know that the outer door skin has to be removed to access the channel. The seal runs almost to the bottom of the door, allowing for full travel of the window when fully opened. Unlike most cars, this is not accessible by removing the inner door cards. I was apprehensive about doing this, as I didn’t want to damage the external paint finish.
First, some research. I ‘googled’ information about this, but didn’t find much, although there was a useful tip on the Antique Automobile Club of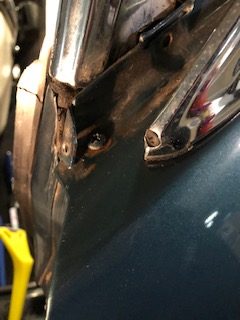 America forum. The first thing to do is to remove the chrome trim at the bottom of the vent window, by removing a screw at it’s leading edge, because under this is a solitary screw that helps attach the top of the door skin to the door frame. If you don’t do this, the skin won’t come away and it could be bent I trying to remove it.
 The skin is held onto the door by 15 small nuts, along the front, bottom and back edge of the inside of the door.
 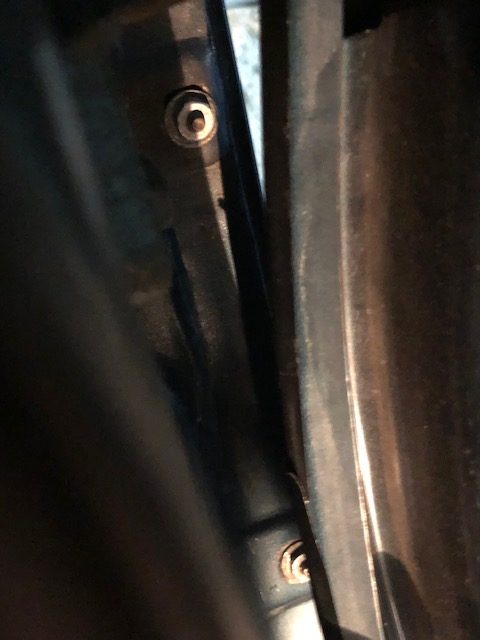 Removing them is not difficult, but being an American car, you need SAE/imperial-sized spanners, of which I don’t have many, but was lucky to stumble across the required 3/8 inch spanner amongst my metric Mercedes-Benz tools. How it got there is a mystery!
Anyway, removing the nuts is not difficult, though sometimes the studs they are attached to spin, as they are loosely attached to the skin to allow fine adjustment of the skin to door frame. Wedging a small screwdriver between nut and door provide the necessary tension to stop them turning. The hardest part was accessing the nuts at the front edge of the door, due to the angle between the door and front fender. Having the door open at just the right angle, using a small spanner and by many very small turns I was able to loosen them. It’s a good idea to put protective tape along the edge of the front fender and door to prevent scratching the paint with the spanner. When all nuts are removed the skin easily lifts off, it’s not heavy, but have a large mat nearby to rest the skin on, paint side up to prevent scratches. 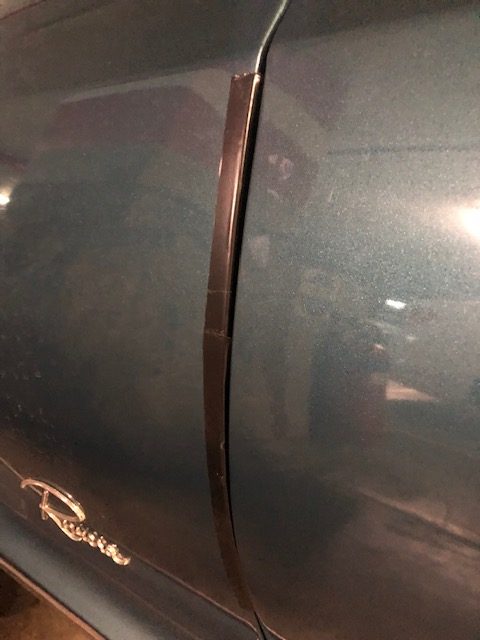
Channel Seal Replacement
Now that the inner workings have been revealed, the entire length of the channel is visible. According to an excellent article by Bill Mawbey in the March/April 2019 Riview, the whole vent window can be removed to replace the channel seal in its entirety. But I found an easier solution, as on my car the bottom half of the seal, not exposed to the elements, was in excellent condition. So I left the vent window in place and just cut off the perished part of the seal down to about 2 inches below the bottom of the window opening. With the window fully down, I was then able to feed the seal down between the metal channel and window. The upper part of the seal was held in place with a little 3M Weatherstrip adhesive, recommended by CARS as the best rubber sealant. The top of the channel has a small hard rubber tip that originally was integral with the channel seal, but which is now supplied as a separate part, so the seal has to be cut with a sharp blade at a 45 degree angle to align with the bottom profile of the tip. The tip is held in place with a screw that passes into the vent window channel.
Window Alignment
When all this was done, I noticed that the leading edge of the window did not alingn with the channel, though the trailing edge of the window did align vertically with the back window seal. Looking at all the exposed inner workings of the window winding apparatus, I couldn’t quite figure out how to adjust this, and didn’t want to play around with it and make things worse. I couldn’t find any more information about this by searching the internet or past issues of the Riview, but knew of the body workshop manual for these cars. Only thing was, I didn’t want to wait the few weeks delay in sourcing a copy from the ‘States. A call to club stalwart, Tony Gentilcore, helped here, as he had a copy, and was happy to scan and email me the relevant section regarding window adjustment. Many thanks, Tony! By loosening the vent frame attaching bolts and adjusting stud & nut (that’s the large nut & washer visible at the inside front of the door, visible only when door is opened), it’s possible to subtly adjust the angle of the vent window so that it aligns with the A-pillar and leading edge of the window.
The window was still a little loose, moving fore and aft a bit too much. Again, consulting the workshop manual showed me how to adjust the window glass run channel, near the door lock, so that it fitted more tightly against the trailing edge of the window.
Door Seal Replacement
Before the door skin was re-attached, I removed the old door seal as it was perished and breaking apart. It’s easy to prize out the small plastic lugs that secure it to the door and attach the new seal by pushing the plastic lugs of the new seal into the small holes in the door. It’s not necessary to have the skin off to do this, but the advantage of doing this without the skin attached, is that you can see that the plastic lugs have been fully pushed through. Such was the degradation and compression of the old seal, that the door now needs a hefty push to close it properly.
Finally, I brushed out the small amount of old California dust from the bottom of the door, and gave it a coat of fish oil to prevent future rust. Fortunately spending most of its former life in the Hollywood Hills of Los Angeles has kept the door internals rust-free. Reattaching the skin is not difficult, but it has to be aligned exactly so all the small attaching studs pass through the holes in the doorframe, allowing the nuts to be attached and tightened. Having another person hold the door skin can help.
This job took at least ten hours over a few days, a steep learning curve! But should I need to do the same to the passenger door in the future, and knowing what I know now, I reckon it could be done in about a third of the time.
The door and window look good, but the test will be when lockdown restrictions ease, and I’m able to drive at speed on the highway, windows closed, with no obtrusive whistling wind noise.